A quilt dyed before it was born
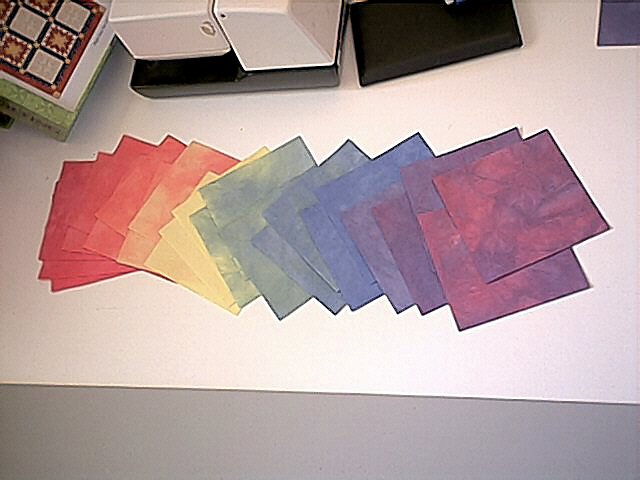
My first dyeing project was to make a 12-step color wheel of fat quarters.
That means that I took 12 peanut butter jars (well, eight PBs & four tupperwares) and arranged them in a triangle. The three jars at the corners had the three pure colors (red, blue & yellow), which are the only actual dyes I have. Everything else is obtained by mixing. The jar at the center of each side had a 50:50 mix of the colors on each side of it. Then the jars to the left and right of center had a 1:3 mixture of the two end colors, with more of the nearest color.
This resulted in fat quarters in Red, Red-Orange, Orange, Yellow-Orange, Yellow, Yellow-Green, Green, Blue-Green, Blue, Blue-Violet, Purple, and Red-Violet.
I didn't have a specific plan for the fabric, but I wanted to make a quilt for my new neighbors, who were getting married and moving into the house behind mine. There's also a quilt show coming up here and I wanted to submit something made with the dyed fabrics.
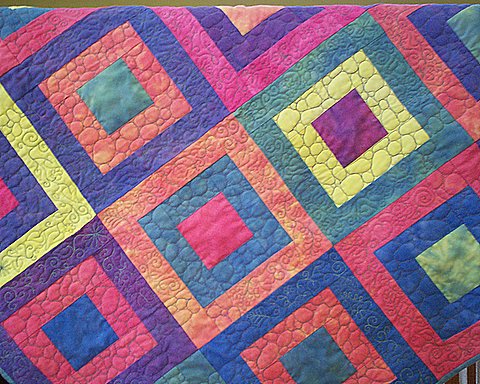
In order to keep the focus on the fabric and the subtleties in the dyed colors, I chose a very simple design and calculated how big a quilt I could get out of my fat quarters. I cut the strips and squares, then lay them out on the table to make good-looking color combinations.

After sewing the strips into borders on the squares, I did it again to choose the next color for each block.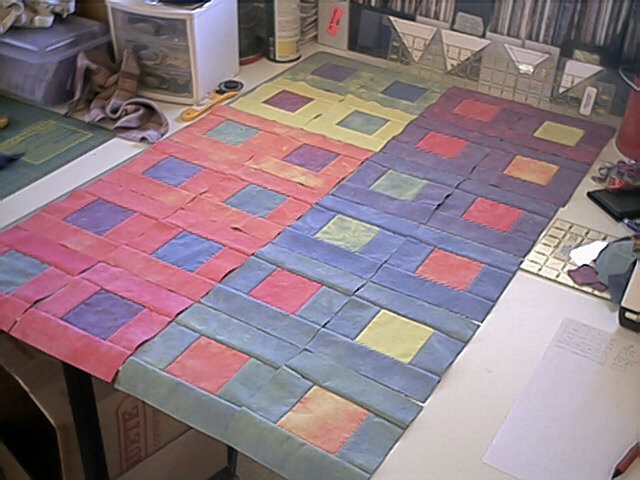
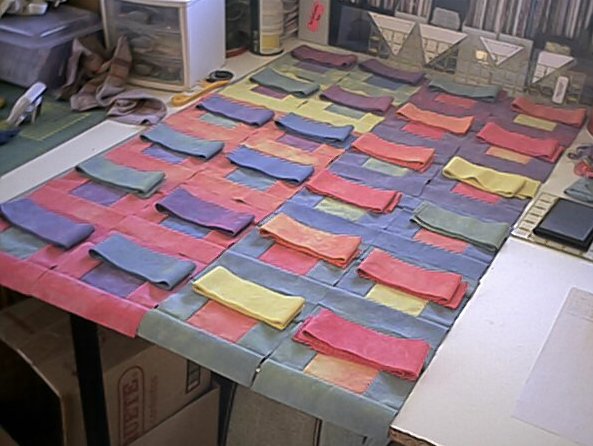
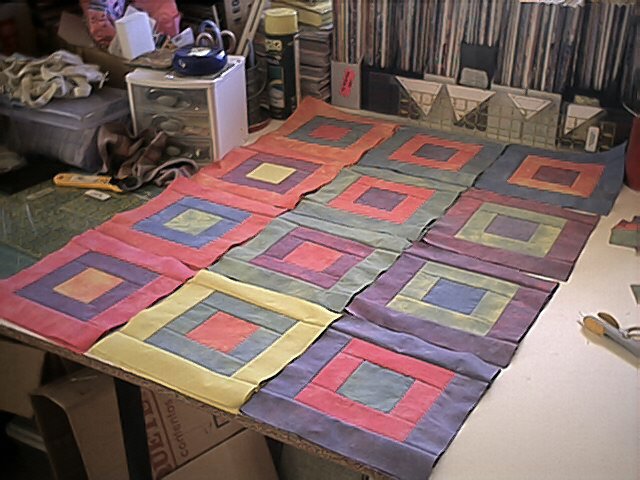
Then I laid them out and rearranged them until I liked the overall effect. I sewed the (24) blocks together, layered the quilt, and pinned it.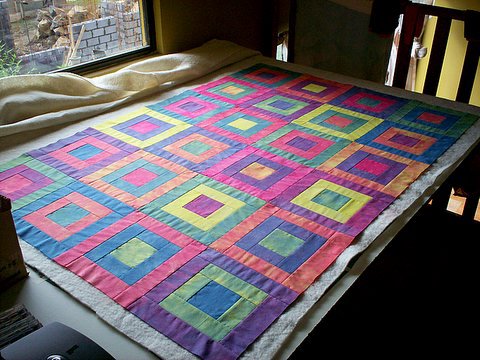
Choosing the back was kind of a challenge. I had a piece of cream colored fabric with gardening motifs on it, drawn in a kind of a seed-catalog style that I liked. Since I first met my neighbors when they used to come up on weekends to plant trees and weed their lot, it seemed like a great choice for the back of the quilt. But it had little stains spotted all over it (a lot of my fabric is from discount sources) and I was going to give up on it until I remembered: I can dye it! So I did, and it came out quite cool but really not right for this quilt.
The technique I use for dyeing lets the dye penetrate the fabric randomly and is meant to come out blotchy and with variations. But this was only my second time trying it--and my first time with a single, large piece of fabric--and it came out way too blotchy and uneven. So what did I do? I dyed it again! And it came out much more suitable for the quilt back; a dark but muted green (the overdye color) with brown vareigations (the original dye job). If I had it to do again, I would probably do the back differently, but it came out suitable, if not ideal, and I learned a lot about dyeing, so that was good.
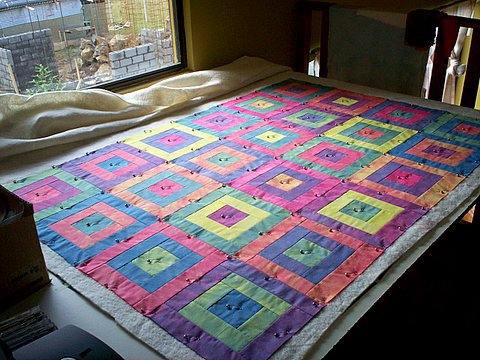
So I had made a simple, throw-sized quilt in a simple pattern. I probably spent a total of three days on it - entirely reasonable. But did I let well enough alone? No, I did not. I just couldn't bring myself to quilt it in-the-ditch (simply following the seam lines). I toyed with different ideas and ended up with a plan that was...a bit more complex than I was theoretically looking for.
I quilted a pebble pattern in the middle border of each block. I was thinking of a garden path, and let the "path" cross over from one block to another at certain points. (If I had it to do again, I would either keep the pebble pattern confined to its borders or link all the blocks instead of creating separate groups of four.) I left the center squares unquilted - the better to appreciate the dyed fabrics - and made a winding vine of leaves, flowers, curliques and made-up stuff in the outer borders.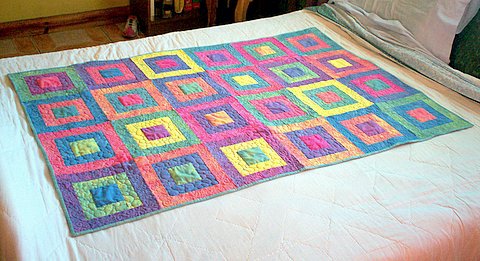

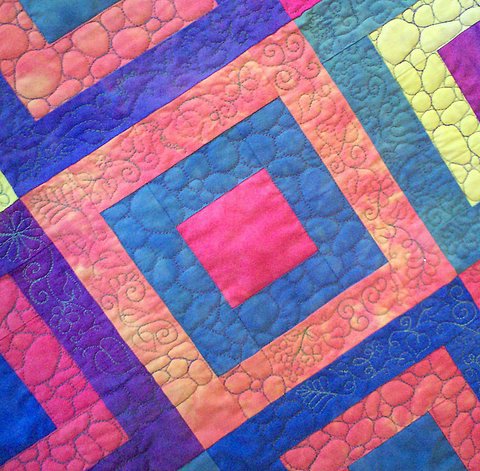
It came out a lot more ornate than I planned, but also pretty cool. I was pretty sure my friends liked the colors because they had shown me a photo of a painting that they chose for their living room. But the quilt is pretty bold, and when I took it over to them today I stressed that it was for curling up with on cold nights. But they really didn't hear me because they were carrying the thing around, trying to decide which wall to hang it on. So I guess it's not too bold after all.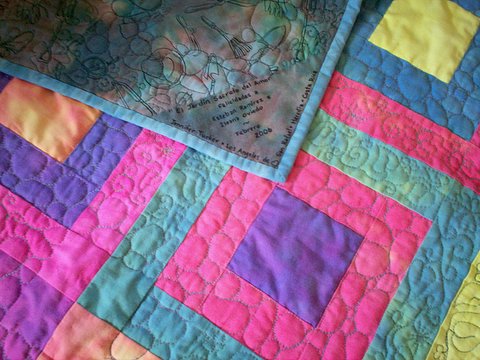


5 comments:
All I can say is, "WOW!!!!"
Having seen it in process a couple of weeks ago I knew it would turn out to be pretty, but this is beyond anything I imagined!
That's cool. Do you just freehand all the designy quilting? Or do you draw it out or anything?
Oops, that's me, anonymous.
Jen, you are amazing. It's awesome. I echo dad...WOW!!! I wish I was your friend so you would make me one.
I love it, as I told you Saturday. My quilting is not much past the adapt-a-pattern stage, but you inspire me to be more bold - and have more fun.
And to think that we started this whole line of behavior as a way to spend time together without having to include either the men or the kids in our lives! Isn't it amazing what we can do on our own?!
Post a Comment